
Tips for Operating a Jetter in the Winter Months

“Can I do hydro-jetting jobs when the temperature gets below freezing?” We get asked that question several times every year – not just “How do I winterize my jetter so it doesn’t freeze overnight?” but also “Should I even try to use the jetter in the winter months?”
“Jetting in the winter months can be an opportunity because there are fewer companies offering their jetting services during those months.”
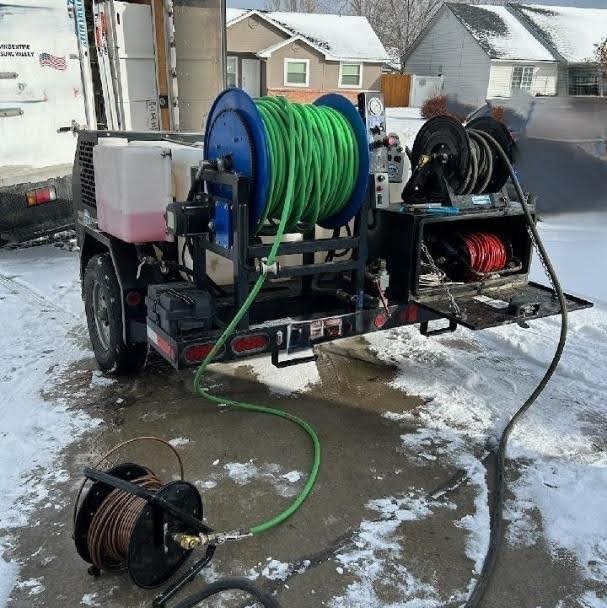
Yes – you can use a hydro-jetter when temperatures fall below freezing (32°f. or 0°c.) – but it requires proactivity – some extra steps – to make sure that water in the jetter’s pumping-system does not freeze between jobs, overnight, or even when the jetter is on the job. Why should I be concerned about ice in my jetter? Because ice expands as it solidifies – expanding in all directions at once – which means that ice can and will break jetter-components such as water-filter casings, pump parts, water-piping, jetting-control valves, and more. Even if nothing breaks, ice can create blockages in the system which can make the jetter dangerous to operate, or even prevent it from operating at all. Nobody wants downtime so we must be proactive to prevent ice buildup in the jetter. First, let’s discuss methods for winterization of a dormant jetter (e.g. “overnight”), and then we’ll unpack methods to prevent freezing during the workday.
1. Overnight or Dormant Jetter Winterization
If you are willing and able to store the jetter in a heated space – whether that’s inside a building or in a heated van/truck/trailer – then just keep that area above freezing and you won’t need to worry about water turning to ice in the jetter. However, most operators want to know how to “keep the jetter from freezing when it’s stored out in the cold”. What they are really asking is how to prevent the water in the jetter from freezing: The first step is always to get as much water out of the jetter as possible; if the jetter has a water-tank then drain the tank completely. Next, disassemble, drain, and clean the water-filter/strainer – routinely – we should be doing that after every jetting-day anyway! Once you have drained as much water out of the jetter as possible, re-assemble the water-filter/strainer and remove the jetting-nozzle from the hose-end. Now you’re ready to purge out the remaining water that is still in the pumping-system and hoses – you can choose from 2 different modes for purging the remaining water from the pumping-system (listed below). IMPORTANT – please realize that you must purge water from ALL pipes, fittings, and hoses on the jetter! Most everyone knows you need to get water out of the pump, but many operators do not realize that after the pump there are 2 separate “paths” of pipes/hoses/fittings that water flows through on almost every jetter:
- The “Jetting-ON” High-Pressure water-path leading toward the jetting hose & nozzle
- The “Jetting-OFF” Bypass water-path for returning water back to the tank
ALL these lines must be purged to avoid an ice-blockage or fracture, therefore after you’ve purged all water out of the open-end of the main high-pressure jetting hose, next you’ll need to cycle all the jetter’s Control-Valves for Jetting On/Off (whether “manual” or “wireless”), for Pulsation, and for Pressure-Adjustment to purge the bypass-return lines. SAFETY/INJURY CONCERN: many operators miss or ignore this final step which can dangerously leave an ice-blockage in the jetter’s pressure-relief system! Therefore, be sure to purge water from all lines on the jetter. 1. Use Compressed Air to Purge out water
- Many jetters have a “Schrader-Valve” (like the air-fill valve on your vehicle’s tires) or an air-hose coupler which allows you to apply pressurized compressed air to the pumping system to purge out all remaining water. Air-Purge is generally the easiest and most “fool proof” way to avoid damage from ice. This Air-Purge method often leaves a little water in parts of the system which can and will freeze (especially in the curls of the long jetting-hose) but typically not enough ice will remain to expand and break things. However, that little bit of water might keep the jetter from operating properly until it thaws out completely. Patience is key – let the air continue to purge until all water AND mist is blown out of the jetter’s pumping systems (remember you need to purge BOTH the high-pressure system and the bypass-return lines).
- If you want to maximize an air-purge: stretch out all the jetting-hose flat on the ground so that water doesn’t settle into the curls of a rolled-up hose.
- Air-Purge can work with just about any jetter and is a particularly handy way to winterize smaller “direct-fed” jetters that don’t have a water-tank.
- NOTE: if your jetter does not have an air-connection valve it can usually be added rather simply – reach out to us for help on this if desired.
2. Use Antifreeze Solution to Purge out water
- Drawing an environmentally friendly “RV Antifreeze” solution (often used to winterize RV’s and boats) into the pumping system is a tried-and-true means to purge out water from the jetter. Done correctly, winterization via Antifreeze-Purge leaves the jetter’s pumping system full of antifreeze solution that remains liquid at temperatures well below freezing. However, Antifreeze-Purge is typically a more complicated process – in fact the process is different for almost every different jetter model. Therefore, the operator must know and follow the antifreeze-purge process specific to their jetter, otherwise 1. They might not get antifreeze into every part of the pumping-system or 2. They might accidentally pump the antifreeze back to the water-tank or even out the tank-drain, thus winterizing nothing. Look for instructions in the operators-manual provided with the jetter and look for video-tutorials online. As mentioned above, remember to purge both the high-pressure system and the bypass-return system.
-
Two more concerns with using antifreeze to purge water from your jetter:
- The operator must watch out for the eventual dilution of the antifreeze solution after several winterization-cycles, because the process allows a little bit of water to mix with the antifreeze solution each time. When the antifreeze solution starts to show signs of icing (it might start to look like a “slushy”) then the solution must immediately be replaced with new antifreeze.
- The operator will also have to remember to recover the antifreeze solution prior to actively jetting again – if the operator forgets to pump the antifreeze back into its own storage-tank then it will get pumped into the drain or sewer to be cleaned on the next job.
This all might sound complicated, but repetition – and following the procedures – make this an effective and popular mode of winterization.
2. Jetter Freeze-Prevention During the Workday
Essentially there are 3 different times when the jetter’s water can freeze during the workday:
1. On The Way to The Jobsite:
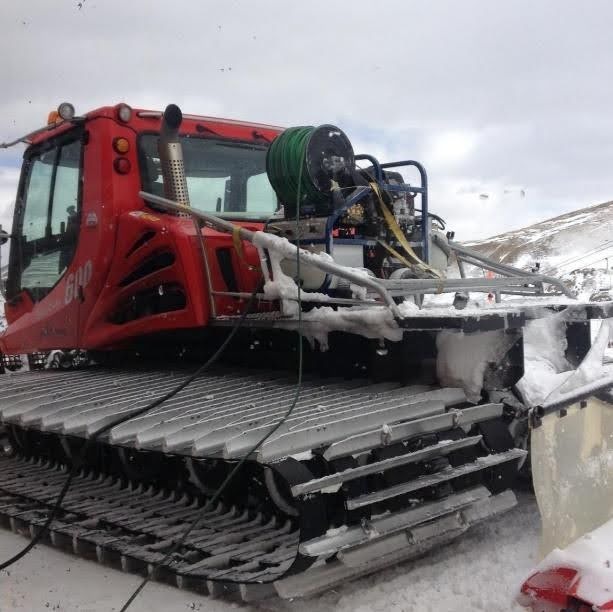
If your jetter stays in a heated van, truck, or enclosed trailer then you shouldn’t have to worry about the jetter’s water freezing on the road from job-to-job. But if your jetter is exposed to the elements on an “open” trailer or truck then your concern is not only whether the temperature outside is below freezing – you also need to be aware of wind chill as you drive.
Even if it is a few degrees above freezing outside you might get to the jobsite and find that the jetter’s hose is full of ice. That’s typically due to wind chill which commonly freezes water in the long jetting-hose, since it is often mounted highest on the jetter. But wind chill can freeze water in the pumping system as well. You can prevent freeze-up on the road by using the “overnight” procedures listed above, but another less-known and quick freeze-prevention method is Cold-Weather Recirculation which is do-able on almost any jetter that has its own water-tank.
The jetter can actually be set up to re-circulate water through all of its lines while you are driving to and setting up the next job. The concept is simple – keep the water moving and it resists freezing. Often a lake will freeze over but the creek leaving it still flows. Same with your jetter. There is a process to this that can differ from jetter-to-jetter – refer to your operators-manual for the correct procedure – but in a nutshell you need to make sure water flows through all high-pressure lines and bypass-return lines at the same time. A typical procedure would go as follows:
(a) remove the jetting nozzle,
(b) connect the jetting hose-end to a recirculation-port on the jetter (if equipped) or secure the hose-end to the open top of the tank to create a water re-circulation loop
(c) start the jetter and run it just above idle,
(d) open the jetting on/off valve just enough that water flows all the way out the end of the jetting-hose and back into the tank while ALSO flowing through the recirculation/bypass lines.
You may want to open any auxiliary control-valves such as the Pulsation-control and pressure-regulator valves. The bottom line to make Cold Weather Recirculation effective is simply to make sure water is flowing through any line that holds water of the jetter.
2. While You Are Setting up to Jet at the Jobsite:
Ok you made it to the jobsite without freezing water in the jetter – now the challenge is to get the jetting hose & nozzle into the pipe to be cleaned before water in the hose becomes ice! This is definitely a situation where the above “Air-Purge” winterization procedure can be an advantage over having to recover antifreeze by pumping water back into the jetting-hose, because with Air-Purge you’ll be stringing out a jetting-hose full of air rather than a hose full of water. But if your hose is full of water there is no magical procedure or hack here – you simply must get the hose/nozzle into the pipe ASAP and start jetting-water flow immediately.
An inexperienced operator may not want to attempt this, because if it is incredibly cold you may only have seconds before the hose and the nozzle’s spray-orifices plug up with ice. Therefore, it is essential to prepare the jetting-access to be as ready as possible before you start stringing out the jetting hose – clear a pathway, remove the cleanout cap or drain cover in advance, and make sure the jetting-area is totally ready so you can bring the hose/nozzle straight to the sewer/drain and immediately put it in and start jetting without pausing to do anything else.
The same holds true when you’re done jetting – get the hose back onto the jetter and winterize or start a Cold-Weather Recirculation immediately to avoid ice-buildup (see above) as you’re closing out the job. Once the jetter is ice-protected then you can go back to secure the work areas and close out the job with your customer.
3. While You or the Jetter Are Taking a Break:
Ok so you want to stop and eat some lunch – or the next job doesn’t require jetting – what do you do to avoid ice buildup? Simply choose any of the procedures listed above. Some operators set their jetter up in Cold Weather Recirculation (see above) while they eat a quick lunch, or while doing a quick non-jetting job. If the jetter will be dormant for several hours between jetting-jobs then you might want to fully winterize via air-purge or antifreeze purge (see above) so you can save fuel – it’s up to you. 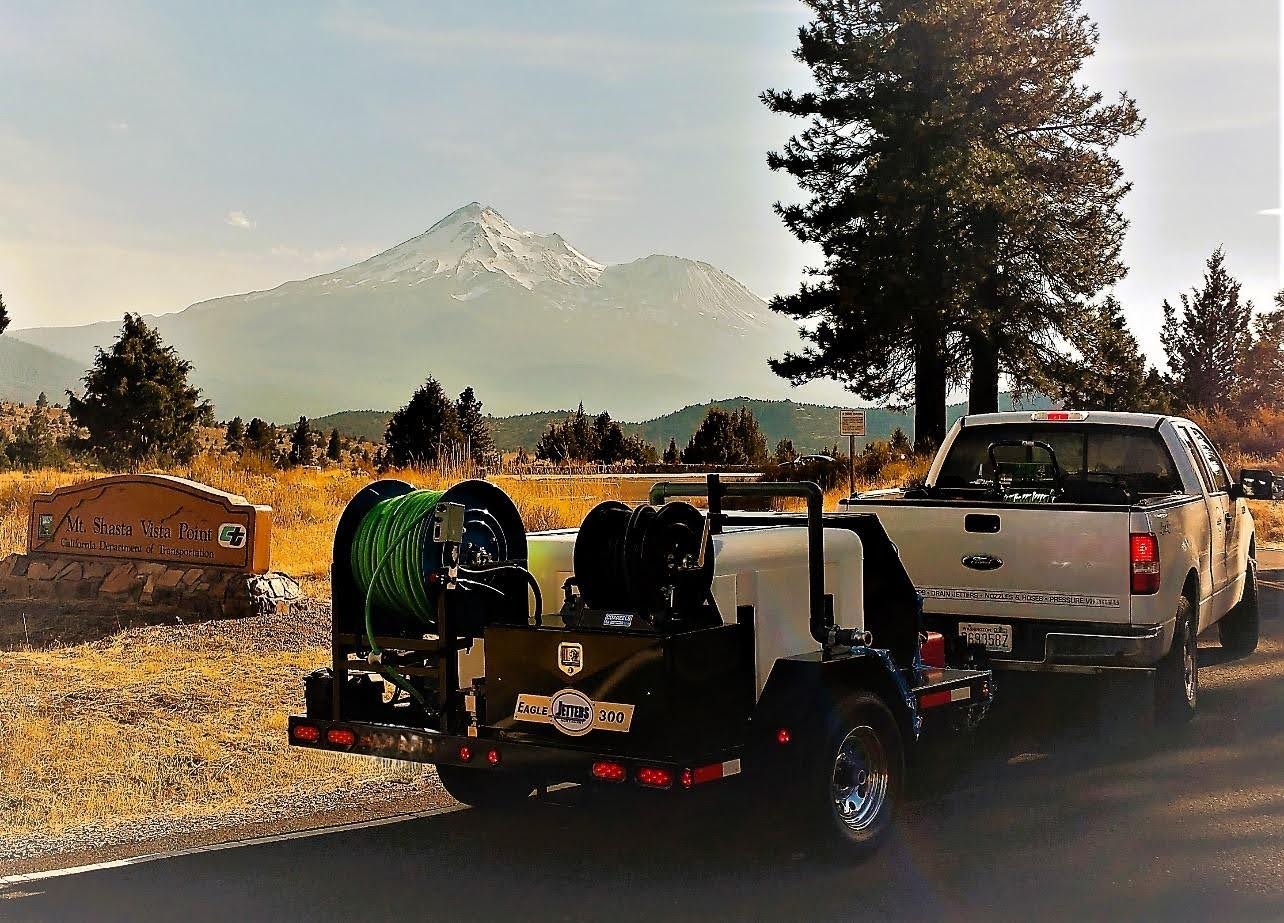
Keep Your Jetter Running Strong All Winter Long
Again, Jetting in the winter months can be an opportunity because there are fewer companies offering their jetting services during those months. Visit youtube.com/@JETTERSnorthwest for step-by-step winterizing demos, maintenance tips, and training videos. You can also ask questions in the video comments or call our team directly at 877-901-1936. And don’t forget to visit shop.jettersnorthwest.com for jetter accessories, hoses, nozzles, and winterization equipment to help keep your jetter protected all season long.
JETTERS NORTHWEST is a 20+ year-old product line of Seattle Pump & Equipment Co. – a service and sales center for jetters for over 50 years.

No blog posts found matching your search criteria.

Root Ranger Nozzles: 3 Types, Which One Should You Be Running?
Not all Root Ranger nozzles do the same job. See how the Single Barrel, Double-Ended, and Double Barrel models match your jetter’s GPM and PSI.

Revolutionizing Jetting Operations: How Wireless Remote Controls Improve Efficiency and Safety
See how a wireless remote jetter control system improves safety and efficiency on the job. Start, stop, and manage your jetter without walking back to the machine.

Back to School: Fall/Winter Jetter Maintenance & Freeze Protection Checklist
Get your jetter ready for fall and winter with this maintenance and freeze protection checklist. Avoid breakdowns, freeze damage, and lost job time.